Happy Thanksgiving!
11.23.2010
11.10.2010
root veggie mash, lamb chops, salad, and spears
Fall is finally here! Root veggies galore, pumpkins, and hearty dishes are all I can think about. The farmer's market is painted in autumnal colors that make my taste buds go wild. And I have finally decided that lamb is my favorite red meat. It is versatile and flavorful, can be fussed with, or left to savor simply dressed in salt and pepper. Sometimes, it is better left simple to accompany other more robust flavors like a pot of roasted root vegetable mash. Yum! This meal is simple, and if made with high-quality and fresh ingredients, doesn't require much added flavor.
I served the mash and meat with some lightly steamed asparagus spears and a salad with persimmons, pepitas, red onions, and a lemon shallot vinaigrette. I use about a 3:1 ratio for olive oil to acid (lemon juice or vinegar), add Dijon mustard (just a dash), salt, pepper, and in this case minced shallot. If you find the dressing is too acidic, try adding a pinch of sugar or a couple drops of honey. This was a relatively simple meal that was packed with flavor. ¡Buen Provecho!
Roasted Root Vegetable Mash
serves 4-6
Ingredients
1 large jewel yam, washed and cut into rounds about 1 to 1.5 inches thick.
1 large turnip, washed, peeled, and cut into rounds about 1 inch thick
2 medium russet potatoes, washed and cut into rounds about 1 to 1.5 inches thick
2 large carrots, washed and cut into wedges
1 Leek, washed and sliced finely
1-2 cloves garlic, use a garlic press to add to the leeks and olive oil
Olive Oil
Salt and pepper to taste
chicken stock (or veggie stock) if needed
Directions
1. Toss all sliced veggies with a little olive oil, place on a baking sheet and cover with aluminum foil.
2. Place baking sheets in the oven and turn the oven on to 400 °F (do not turn the oven on before you put the veggies in. By allowing them to heat up with the oven, the sugars caramelize better and the flavor is better).
3. Once oven is hot, cook the root vegetables covered for 30 minutes then remove the foil and cook until easily pierced with a fork, another 20-30 minutes.
4. In the meantime, heat olive oil in a deep pot, add sliced leeks and cook until tender. Once tender, add garlic, cook for 1-2 minutes and turn off heat.
5. When vegetables are ready, take them out of the oven and dump them into the pot with the leeks, olive oil, and garlic.
6. Using a potato masher, mash all vegetables together. If they are dry, add some chicken stock, about 1 cup added in 1/2 cup increments. Add salt and pepper to taste.
Grilled Lamb Rib Chops with an optional Chimichurri sauce
Ingredients
Lamb rib chops
Salt
Pepper
Directions
1. Heat grill
2. Cook ribs turning once so each side is evenly charred. Make sure your instant read thermometer reaches the recommended temperature for lamb.
Chimichurri Sauce
Ingredients
1/2 bunch parsley, washed and finely chopped
2 cloves garlic
1/2 lemon, juiced
red pepper flakes
Olive oil
Salt and pepper to taste
Directions
1. Mix all ingredients together and spoon over meat.


10.19.2010
butternut chicken-noodle soup
We don’t get many rainy days in San Diego, so when we do I like to make fall-y dishes and savor the moment. Chicken noodle soup has a reputation for being curative so I decided to make it and see if it’d help me feel just a little bit better. The only problem is that I was craving a sort of hearty and sweet soup, so I had to mix the savory “normal” flavor of chicken soup with something sweet: a butternut squash. It was a marriage made in heaven.
Ingredients
Serves 4-6
1 large onion, diced
1 small bunch celery, sliced coarsely
2 large carrots, sliced coarsely
1 whole chicken, cut into large pieces (or use your favorite cut, just be sure to leave some of the skin for flavor)
Egg noodles, I prefer linguine egg noodles—not too thick, not too thin
1 small-medium butternut squash, cubed in about 1.5/1.5 inch squares
Olive oil
Water
Salt and pepper to taste
Directions
- Add a little oil to the bottom of a dutch oven, heat on high.
- Once heated, add the chicken pieces. Cook until just golden brown.
- With a slotted spoon, remove chicken from pot, set aside.
- If needed, add a bit more olive oil, turn heat to medium, and add onions, celery, and carrots. Cook until soft, about 10 minutes. Be sure to stir!
- Add chicken back into the pot, fill with water—until chicken is more than just covered.
- Bring to a boil and then cook on medium for about an hour.
- In another pot, boil water, salt it, then cook egg noodles.
- While noodle water is coming to a boil add the squash to the chicken mixture, let cook.
- Add salt and pepper.
- When noodles are done, add them to the bowls and cover with chicken soup. OR you can add the noodles to the soup directly, is personal preference.
¡Buen provecho!


10.18.2010
spaghetti alla bottarga
Some foods are best when left simple. This is the case with Bottarga, it is a type of caviar that is highly coveted by the Sicilians. Bottarga is either tuna roe or mullet roe that is grated over pasta. Our Sicilian friend had us over for this amazing dish, since then we've been making it on our own. He used squid-ink pasta, the ink adds a salty-sweetness to the dish. I highly recommend finding this pasta as it will add lots of flavor. The recipe is fast and delicious and you only need 4 ingredients.Too bad I was so eager to eat it...I forgot to take a picture, but if you like caviar you will probably love this dish. If you look online, you can find pictures of the squid ink pasta and pictures of Bottarga...now go get some and make yourself this dish!
Ingredients
Serves 4
400 grams ink pasta
3 cloves garlic, chopped finely
olive oil
Bottarga
Directions
1. Fill pot with water (for pasta), when it comes to a boil, salt the water and add the pasta cooking until al dente--follow the directions on the package.
2. In a pan, heat olive oil. Add garlic and cook until fragrant, approximately 1-2 minutes.
3. When pasta is done, drain and add to pan with garlic and oil.
4. There are two variations on how to add the Bottarga, you an either add it to the oil (after the garlic is done) and let cook VERY briefly, add the pasta and toss together--OR--you can add the pasta to the garlic-oil mixture, grate the Bottarga on top, then toss.
Serve with a side salad, I used kale as the bitterness from the kale salad complements the salty-sweet pasta.
9.29.2010
cranberry walnut chicken salad
On Monday evening, I roasted a whole chicken. It turns out perfect every time thanks to my trusty instant-read thermometer and to the chicken dude who sells them to me on Sundays at the Hillcrest Farmers' Market--giblets and all. I buy whole chickens because they taste better. Actually, if you cook any meat or fish with the bones, it will taste better. I also buy whole chickens because I make my own stock. I freeze the bones and giblets until I'm ready to throw them into a pot of sauteed veggies (onions, carrots, and celery) and slow cook them into a perfect stock which is easy to freeze and use as I please.
The only problem with cooking a whole chicken, especially when there are only two of you, is that you have a bunch of leftovers and have to creatively think of new and hopefully exciting ways to prepare it each day. After eating chicken sandwiches for the past couple of days, I decided it was time to make a chicken salad. I am not a fan of the usual curried chicken salad that you will find on most tables. I like my chicken salad to be salty and sweet, tangy, and crunchy. This one is refreshing and light, perfect for any time of year and is oh-so-versatile. I like to eat it in red-leaf-lettuce wraps, on top of chopped romaine, on some fresh sourdough, in a grilled sandwich, or just by itself. I was inspired by this recipe from Gourmet except I didn't have all the ingredients, so I improvised.
Cranberry Walnut Chicken Salad
Serves 2
Ingredients
1-2 cups coarsely chopped chicken
1/4 cup walnuts, chopped and toasted if desired
1/2 celery rib, diced finely
2 tablespoons finely chopped shallot or red onion
1/4 cup chopped dried cranberries
1-2 tablespoons Vegenaise (the grapeseed oil one with the purple top) or mayonnaise
1-2 teaspoons vinegar, you can use rice vinegar, white wine vinegar, or champagne vinegar
salt to taste
lots of freshly ground black pepper


9.13.2010
coconut cream pie
I'm an ice cream kind of girl, but my husband prefers baked goods. He loves lemon bars, cookies, cakes, and pies. His favorite pie is a coconut cream pie. He recently requested one, so I set out on making one that wasn't too sweet or overly coconut-y. I whipped up a simple vanilla pudding, threw in some coconut and let it cool in a fresh pie crust. Below are the recipes. The pie was so good we didn't get a picture of it, but I found one that looks similar so you can imagine what it'll look like. Enjoy...
Pie or Tart Crust
from The Art of Simple Food by Alice Waters
Makes two 11 inch tarts, or one double crust nine-inch pie. It's easily doubled or halved.
Ingredients
1/2 cup ice cold water
2 cups all purpose unbleached flour
1/2 tsp. salt (if using unsalted butter)
Directions
1. Whisk together: flour and salt (if using unsalted butter)
2. Add 12 tablespoons (one and one-half sticks) cold butter, cut into small (1/4") cubes.
3. Cut or work the butter into the flour with a pastry blender your fingertips, or two knives using a scissor-like motion, leaving some of the butter in fairly large, irregular pieces. This will take 1-2 minutes. Pour in three quarters of the water, stirring all the while with a fork until the dough begins to form clumps. Keep adding water if needed. Divide the dough in two, bring each part together into a ball, and wrap each ball in plastic wrap. Let rest, refrigerated, for one hour or longer.
4.Rolling out the dough. If the dough has been in the 'fridge for many hours, take it out to warm a bit (no more than 20 minutes). If it's just been in the 'fridge an hour or two, it's ready to roll out.
5. Choose a surface that is smooth and cool with plenty of room to roll the dough out. Flatten the ball with your hands while it's still wrapped and/or pound it with your roller to flatten it out. If cracks appear on the edge of the dough, just pinch them together.
6. Dust the counter lightly and evenly with flour, dust the top of the dough with flour, tap the dough with the rolling pin to flatten it out even more, and then roll from the center of the dough disk out toward the edge with firm but consistent pressure. Don't roll back and forth, continue to roll outwards from the center.
7. Brush off extra flour gently with a brush or lightly using a kitchen towel, fold it in half and then quarters, and ease gently into the pie pan. Or you can roll the dough onto the rolling pin to transfer into the pie pan.
8. Cover crust with parchment paper and fill paper with pie weights, rice, or beans so the crust cooks evenly. Cook for 7-10 minutes.
9. Remove parchment paper and weights, cook crust an additional 3-5 minutes or until just golden brown.
10. Fill.
Coconut Cream Pie--Filling
from Real Simple Magazine
Makes 2 cups
Ingredients
1/2 cup sugar, or less, depending upon your desired sweetness. (I use just under a half cup)
3 tablespoons cornstarch
1/8 teaspoon salt
2 cups whole milk
2 egg yolks
2 tablespoons unsalted butter
1 teaspoon vanilla extract
3/4 C Unsweetened, shredded coconut
1 C whipping cream
Directions
1. Whisk together the sugar, cornstarch, and salt in a saucepan.
2. Pour 1/4 cup of the milk into the sugar mixture, stirring to form a smooth paste. Whisk in the remaining milk and the egg yolks.
3. Cook the pudding mixture over low heat, stirring continuously with a wooden spoon until thickened, about 20 minutes. Do not allow it to boil. Remove from heat and stir in the butter and vanilla.
4. Toast coconut in the oven--350 °F for 10-15 mins, until just golden
5. Scrape the pudding into a bowl and add toasted coconut.
6. Cover with plastic wrap, pressing the surface to make an airtight seal and prevent a skin from forming. Refrigerate until well chilled, about 1 hour. Then fill cooled pie crust with chilled pudding. Refrigerate and top with fresh whipped cream when ready to serve.
8.26.2010
clinic work in the Solomon Islands
Thanks to Direct Relief International and the Loloma Foundation, I provided medical care and supplies to people in Roviana Lagoon, Vonavona Lagoon, and Simbo Island, Solomon Islands. With the almost $6000 donation, more than 8 rural health clinics received supplies and I personally treated over 200 patients. Most of the patients were in Baraulu Village where there is no permanent clinic. On Simbo Island, there is an RN-run clinic where I volunteered, saw patients, and donated over half of the medication donation. Currently, the Loloma Foundation is visiting the Solomon Islands and will provide free surgical care to those who need assistance. And much to my excitement, they will be visiting my friends on Simbo Island. I feel blessed to have had this opportunity to provided much needed assistance to such beautiful, hard-working, and resilient people.
Below are some pictures of the Tumbi Rural Health Clinic on Simbo Island, the one I set up in Baraulu Village, the beautiful and always-giggling children, and of the ocean's little creatures. Enjoy.


Below are some pictures of the Tumbi Rural Health Clinic on Simbo Island, the one I set up in Baraulu Village, the beautiful and always-giggling children, and of the ocean's little creatures. Enjoy.
8.24.2010
pico de gallo
I ask myself why people buy store-bought pico de gallo or salsa fresca when it is so easy to make. All you have to do is dice up some tomatoes, onions, and chilli peppers, add a few condiments and voila, you are done. Easy enough, right? It'll taste a whole lot better too.
Pico de Gallo
a whole bowl full :-)
Ingredients
8 large tomatoes, chopped
1 large white onion, finely chopped
2 Serrano or Jalapeño peppers, de-seeded and minced--as many as you can handle
Juice of 2 lemons or limes
salt and pepper to taste
Directions
1. Chop all ingredients and add to bowl.
2. Squeeze lemon or lime juice over chopped ingredients, add salt and pepper.
This is a picture of a pico de gallo I made recently. I used various types of tomatoes from my garden to add color and flavor.


simple green bean salad
Here's a simple recipe that is fresh and light. Green beans are in season at the moment, so they only need to be steamed briefly. Adding a little red onion provides a tangy flavor while the toasted almonds add depth. Enjoy...
Ingredients
Green beans, cleaned, enough to feed anyone who will be eating
1 small red onion, sliced thinly
handful of almonds, toasted
olive oil to drizzle
salt and pepper to taste
Directions
1. Steam beans until brightly colored, only a couple of minutes. Rinse under cold water when done to slow down the cooking process.
2. Toss beans, sliced onions, toasted almonds**, and drizzle with olive oil. Add salt and pepper to taste.
**Take whole almonds, chop coarsely and toast over medium heat in a heavy skillet until fragrant.

tomatoes galore
Last year's tomato bounty wasn't quite as overwhelming as it is this year. Despite my efforts to make sauce, I am not keeping up with all of the tomatoes, they keep falling off the vines onto the dirt! I was searching on the internet for another way to preserve the tomatoes and found a great recipe for slow-roasted tomatoes from Smitten Kitchen which I'll try, but I'll leave out the seasonings so I have plain tomatoes I can add to any dish.
The tomatoes I'm using are Yellow Pears, they are small, juicy, and packed full of flavor. All you have to do is cut them in half, place them on a baking sheet and bake for a few hours at about 250 or 300°F. Once they are done, I'll freeze them to throw into pastas, couscous, or maybe even a frittata. So, whether or not you grow your own tomatoes or are taking advantage of a CSA, or farmer's market, you can roast your own to keep and use over the cooler months.


The tomatoes I'm using are Yellow Pears, they are small, juicy, and packed full of flavor. All you have to do is cut them in half, place them on a baking sheet and bake for a few hours at about 250 or 300°F. Once they are done, I'll freeze them to throw into pastas, couscous, or maybe even a frittata. So, whether or not you grow your own tomatoes or are taking advantage of a CSA, or farmer's market, you can roast your own to keep and use over the cooler months.
And here's a photo of the roasted tomatoes:

6.12.2010
sustainable and local meats
For those of you who live in San Diego, check out Home Grown Meats in La Jolla. I bought some flank steak the other day, it was tender and juicy. The meat is grown locally and is fed grass...ONLY grass it's whole life! Check out their website and decide for yourself.

Solomon Islands

I'm leaving on my third adventure to the Solomon Islands, yaaaayyyyyy!!! During the summers of 2005 and 2006 I coordinated a National Science Foundation funded field school for a professor at UC Santa Barbara. This time, I'm going with my husband who has been working there for over 8 years. While he does his research, I will be conducting my own research relating to perinatal mortality and will be working in rural clinics throughout the Western Province. Through the Loloma Foundation and Direct Relief International, I was able to secure a large donation of medications for the clinics that I will be visiting. The locals will be so happy and thankful!
I'll take lots of pictures and post them when/if I can since there is very limited internet access. So for now, have a great summer and enjoy the sunshine. Don't forget to wear sunscreen!!!!

Here are a few pics from my last visit:
5.18.2010
port-y nibbles
We were invited to a port party last weekend. Kind of like a wine party without the wine. Each person had to bring a bottle of a specific kind of port (we brought the Tawny port) and something to go with it. I wasn't sure what to make so I called up my sister who is an excellent cook She makes a delicious endive appetizer that always ends up being a hit at parties. Endive, glazed pecans, gorgonzola cheese....how could I go wrong? I wanted to bring a second appetizer and came across some fig spread at the market. I thought it'd be good with goat cheese so I picked those two things up too to make little toasts. Below are pictures and the quick recipes that went over really well at the port-y.
Endive Appetizer
Ingredients:
2-3 endives, leaves separated, washed and dried
gorgonzola cheese, crumbled or creamy--it is your preference
glazed pecans, chopped and whole
1 Tablespoon olive oil
2 Tablespoons balsamic vinegar
1 teaspoon dijon mustard
Directions:
1. wash endives and set out on plate
2. mix cheese and pecans (some chopped and some whole) in a 1:2 ratio so the mixture is heavy on the nuts
3. scoop mixture into each leaf
4. mix olive oil, vinegar, dijon mustard, salt and pepper and drizzle over endives.


Goat Cheese, Fig, Sage Crostini
Ingredients:
1 baguette french bread
Goat cheese, plain (not flavored)
fig spread
sage leaves, washed and dried
olive oil
Directions:
1. Preheat oven to 400 °F
2. Slice baguette diagonally into thin, even pieces
3. Using a pastry brush, lightly brush one side with olive oil and bake for 10-20 minutes, or until toasted and golden.
4. heat olive oil in pan, when glistening, add sage until no more bubbles appear and drain on towel lined plate.
5. When toasts are done, spread a thin layer of cheese on each toast, to with a small amount of fig spread and crumple the sage leaves on top.
6. Lay remaining whole fried sage leaves on plate as garnish.


a carrot you will like
Sunday's farmers' market was in full bloom. Too bad I didn't take my camera with me to capture the explosion of colorful food that lined the tables---I was too busy buying food and filling up my grocery bags with the gifts of the season. The carrots were bright orange and huge. I don't think I've ever seen carrots that big at the market before, they must have loved all the rain we got this year! Although I do love carrots, I don't really love them raw. I do, however LOVE them in soup. I took Alice Water's recipe from The Art of Simple Food but replaced most of the butter with olive oil. It turned out delicious and is even better a couple of days after you make it. You could dress it up by adding a dash of cream, thyme, parsley, green onions, or some rosemary. It is great as I made it below. We had it with a grilled portobello mushroom sandwich which I have to say is one of the best ways to eat a portobello mushroom. It is simple, filling, and amazingly flavorful. I hope you have a chance to try one (or both) of these recipes. Enjoy!
Carrot Soup
Ingredients:
2 Tablespoons olive oil
1 Tablespoon butter
1 medium onion, chopped
approximately 6-8 Cups sliced carrots
2 Cups chicken stock
water to cover carrots
salt and pepper to taste
dash of heavy cream
Directions:
1. heat olive oil and butter in pan, add onions and saute until translucent over low heat
2. Add carrots and saute for 15 minutes (or longer if you have more time)
3. Add stock and water, enough to submerge carrots.
4. Using an immersion blender (if you don't have one, use a food processor or blender, just be careful not to burn yourself!) puree the soup mixture.
5. cook for another 15 minutes and up to about 45 minutes...this soup is not a science, the longer the flavors mingle the better it will taste.
6. Add salt and pepper to taste
7. Once served in a bowl, pour a dash of cream into the center, using a fork or knife make a swirling motion and the cream should create a design---you can just add the cream and forget about swirling if you want to.
8. Enjoy hot, cold, and save some for leftovers because it is even better a couple of days later!

Portobello Mushroom Sandwich
2 servings
Ingredients:
1-2 Portobello mushrooms
mayonaise (I personally love Vegenaise)
4 slices sourdough levain (we get ours from Bread and Cie, you can use regular sourdough too)
mild cheese (optional)
Directions:
1. Heat grill, once hot grill mushrooms for about 2-3 minutes per side depending upon heat of your grill.
2. spread a very light layer of Mayo on one slice of bread, cover with sliced grilled Portobello mushroom, cheese, and then cover with the other piece of bread.
3. Grill sandwich using a panini press, a George Foreman grill, or you can use a non stick skillet. Once cheese is melted and bread is toasted it is ready to serve.
4. Cut sandwich in half and serve warm.

5.16.2010
Kitchen Tools
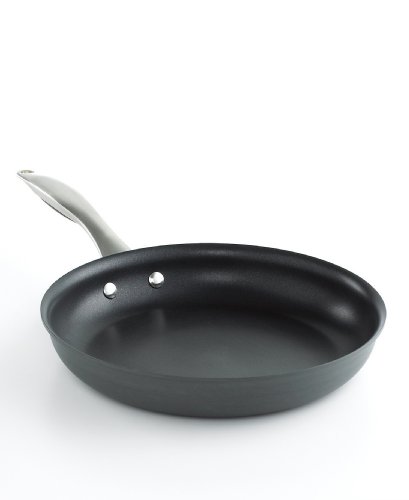
According to Cooks Illustrated Magazine, every kitchen needs a few key tools. One of the tools they recommend is a 10" non-stick fry-pan. They rate certain brands based upon performance, wear, and of course cooking ability. I have never owned a non-stick pan and consider myself absolutely clueless when it comes to choosing one, so I took Cook's recommendation and set out to purchase my very first non-stick pan to complete my set.
One of the most surprising recommendations they made was that I should purchase the cheapest (yet effective) pan I can find because non-stick pans get beat up and have to be replaced relatively frequently. The pan recommended by Cooks was not available anywhere, so I went ahead and bought one that was comprable to it, the Belgique Hard Anodized Fry Pan, 10". So far I've used it to make frittatas and Spanish Tortillas which have turned out perfect! I can't believe how much better they turn out now and how much easier they are to separate from the bottom of the pan so they look nice when plated. So, if you don't have a non-stick pan yet, you should go get one. Your life (cooking life, that is) will be much easier. Just remember, don't use metal utensils on a non-stick pan, use wood or if you have to, plastic.
I'll be back later this week (hopefully) with a few new recipes. Until then...
5.05.2010
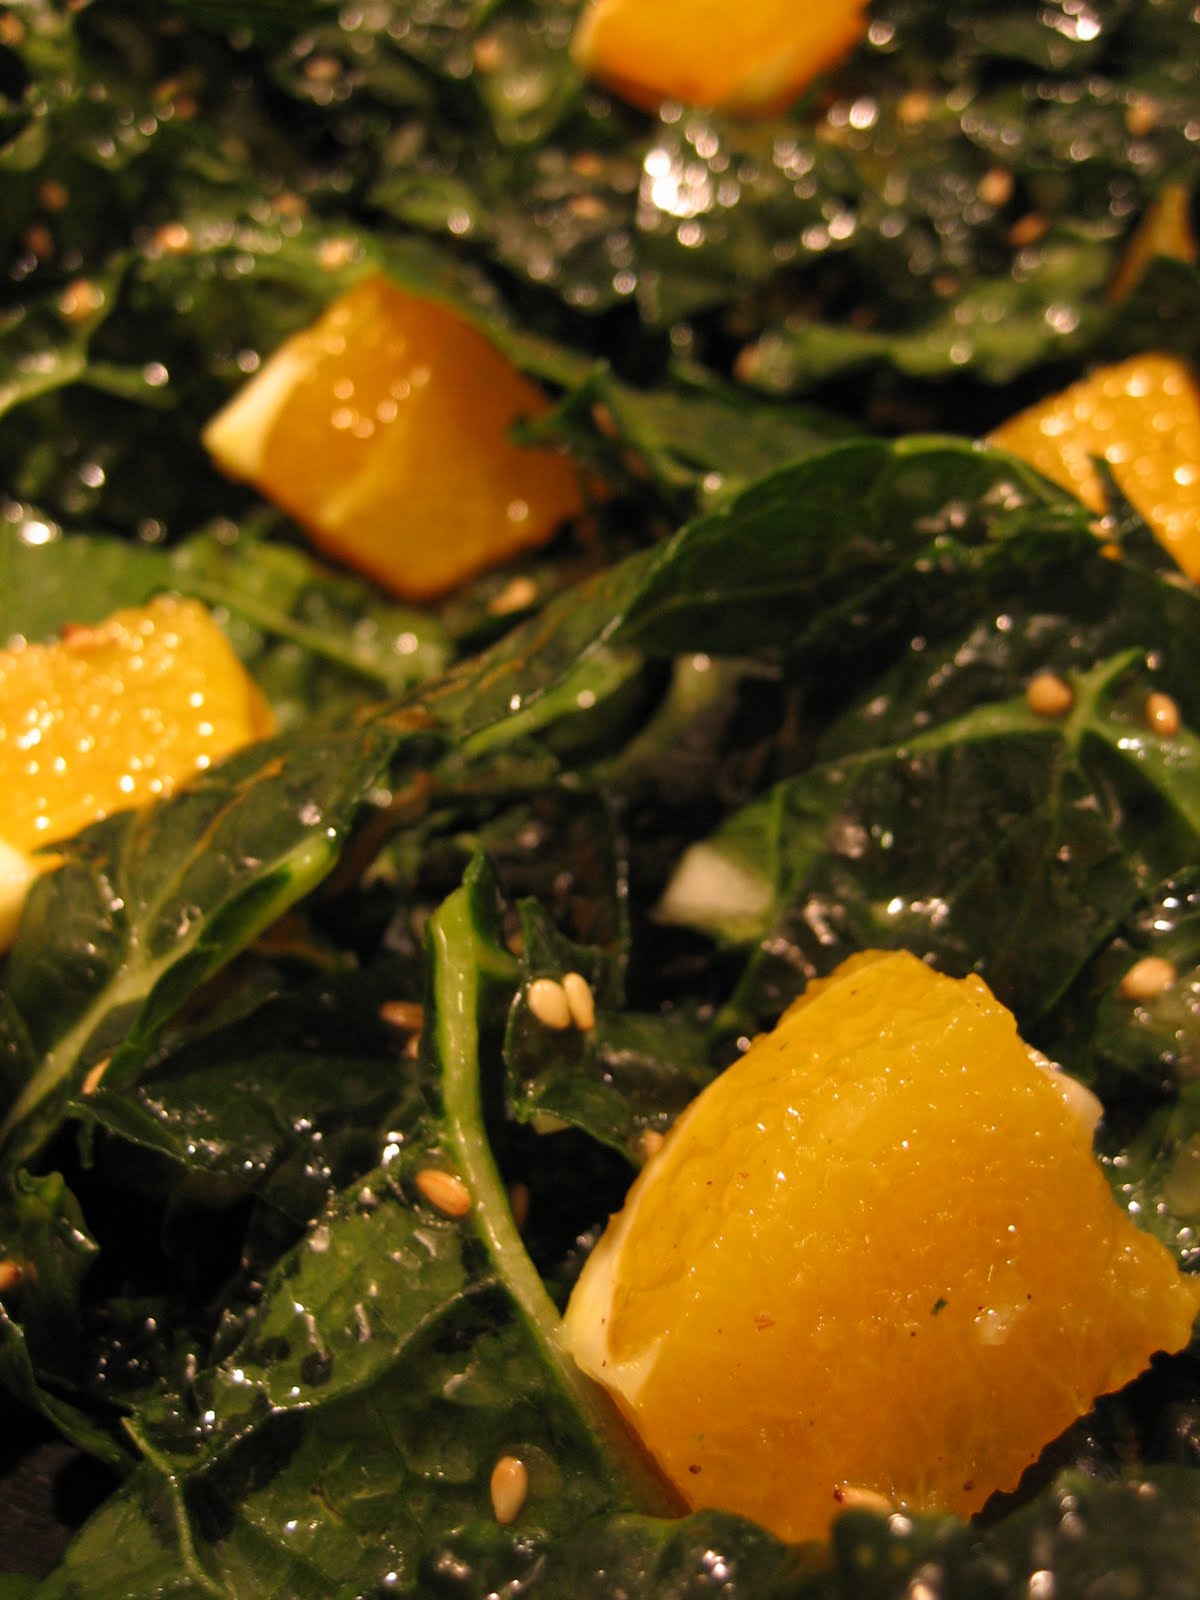
miso-glazed sea bass and sesame-citrus massaged kale salad
San Francisco has some of the best dim sum around. On one of our trips, my mother took us to her favorite dim sum restaurant, not your usual sort of dim sum joint. This one was quite the experience, a tad on the fancy side, but serving up succulent dishes. Hands down, the best dish we had was the giant puck of miso-glazed Sea Bass. From that day on, we just had to know how to make it! After some research, I found a recipe for the miso-glaze on Epicurious.com, I included the link below. Along the way, we also discovered Patagonian Toothfish, better known as Chilean Sea Bass. It has the consistency of rich butter, it literally melts in your mouth. It was the perfect fish to glaze. This fish is endangered, so please find MSC certified fish--it is supposed to be a well-managed fishery. You could probably substitute another mild fish, but I promise you won't get the same effect as you will with the Patagonian Toothfish. We usually enjoy our fish with some steamed Japanese rice (Koshihikari), but since we didn't have any, we had whole-wheat couscous. On the side we had a citrus-sesame massaged kale salad--fresh kale from the garden...we aren't the only ones who love kale! You will see what I mean in the photo below. It took me a long time to inspect each and every leaf for tiny green crawly guys. But in the end, I got them all off, thank goodness. Here's a picture of the darned little critter: can you see him?

Miso-glazed Sea Bass
4 servings
Inspired from this recipe
Ingredients:
1/3 Cup Sake
1/3 Cup yellow miso paste (we use different kinds, depending upon what we have on hand, so I know that red paste works well too)
1/3 Cup Mirin (sweet Japanese rice wine)
3 Tablespoons packed brown sugar
2 Tablespoons soy sauce
1-1.5 lbs Fish, cut into individual serving sizes
Directions:
1. Mix first 5 ingredients together, add fish and allow to marinate for 20 minutes to 4 or 5 hours maximum. I prefer to let it marinate for no more than 1 hour.
2. Preheat oven to 350 °F, place fish in glass baking dish, discard excess marinade.
3. Bake fish covered for approximately 15-20 minutes or an instant read thermometer reads 130-135 °F. Whatever, you do, don't overcook it!
4. Turn broiler on, broil fish for about 5 minutes, or until the top of the fish is slightly caramelized. Watch closely, oven times vary and you don't want to burn your fish!
5. By this time, the instant read thermometer should say about 140-145 °F. Enjoy!

Sesame-Citrus Massaged Kale Salad
Servings 4
Ingredients:
4 cups Lacinto kale, chopped or as I measured it: 4 fist-fulls kale, chopped
2 small Valencia oranges
1 clove garlic, minced (or pressed)
1/4 small red onion, sliced paper thin
2-3 Tablespoons Olive Oil
1-1.5 Tablespoons toasted sesame seeds (if you don't have toasted ones, just throw them on a warm skillet and toast until aromatic, keep stirring so they don't burn)
salt and pepper to taste
Directions:
1. Wash kale, dry well, and chop. *Use a very sharp knife so you don't bruise the kale
2. Massage kale with Olive oil--use your hands and rub the kale, don't skip this step as it is what makes the kale more pliable.
3. Squeeze juice of 1/2 an orange, set juice aside.
3. Peel and cut (into chunks) remaining 1.5 oranges, add to Kale.
4. Thinly slice onion, add to salad.
5. mix salt, pepper, and garlic into orange juice. Toss into salad when you are ready to eat.
6. At the last minute, toss the salad with the sesame seeds, they will get soggy if you toss them in and let the salad sit, so be sure this is the last thing you do!


And here you have it, dinner (you can see the caramelized side of the fish from this angle):


Miso-glazed Sea Bass
4 servings
Inspired from this recipe
Ingredients:
1/3 Cup Sake
1/3 Cup yellow miso paste (we use different kinds, depending upon what we have on hand, so I know that red paste works well too)
1/3 Cup Mirin (sweet Japanese rice wine)
3 Tablespoons packed brown sugar
2 Tablespoons soy sauce
1-1.5 lbs Fish, cut into individual serving sizes
Directions:
1. Mix first 5 ingredients together, add fish and allow to marinate for 20 minutes to 4 or 5 hours maximum. I prefer to let it marinate for no more than 1 hour.
2. Preheat oven to 350 °F, place fish in glass baking dish, discard excess marinade.
3. Bake fish covered for approximately 15-20 minutes or an instant read thermometer reads 130-135 °F. Whatever, you do, don't overcook it!
4. Turn broiler on, broil fish for about 5 minutes, or until the top of the fish is slightly caramelized. Watch closely, oven times vary and you don't want to burn your fish!
5. By this time, the instant read thermometer should say about 140-145 °F. Enjoy!
The fish was baked on end, here they fell on their side, so you can only see the edge of the caramelized side of the fish...
Sesame-Citrus Massaged Kale Salad
Servings 4
Ingredients:
4 cups Lacinto kale, chopped or as I measured it: 4 fist-fulls kale, chopped
2 small Valencia oranges
1 clove garlic, minced (or pressed)
1/4 small red onion, sliced paper thin
2-3 Tablespoons Olive Oil
1-1.5 Tablespoons toasted sesame seeds (if you don't have toasted ones, just throw them on a warm skillet and toast until aromatic, keep stirring so they don't burn)
salt and pepper to taste
Directions:
1. Wash kale, dry well, and chop. *Use a very sharp knife so you don't bruise the kale
2. Massage kale with Olive oil--use your hands and rub the kale, don't skip this step as it is what makes the kale more pliable.
3. Squeeze juice of 1/2 an orange, set juice aside.
3. Peel and cut (into chunks) remaining 1.5 oranges, add to Kale.
4. Thinly slice onion, add to salad.
5. mix salt, pepper, and garlic into orange juice. Toss into salad when you are ready to eat.
6. At the last minute, toss the salad with the sesame seeds, they will get soggy if you toss them in and let the salad sit, so be sure this is the last thing you do!
Lacinto Kale: there are differnt kinds of kale, so be sure you get Lacinto...it works really well for salads

And here you have it, dinner (you can see the caramelized side of the fish from this angle):

5.04.2010
Rajas
Tacos are very versatile. You can throw almost anything into a fresh, warm, corn tortilla and it will melt in your mouth. Here's a great recipe we learned while living in Rhode Island, where we couldn't find any Mexican Restaurants that lived up to our California favorites. I admit, we get spoiled by the food here. This recipe is relatively simple and quick once you get used to peeling the peppers. Watch out, because each bite can pack a spicy punch! Choose your peppers wisely!
Rajas
2-3 servings
Ingredients:
6 Poblano Chile Peppers (you can use Pasilla chiles instead if you like)
1/2 white onion, sliced
2 cloves garlic, sliced
1/2 cup chicken (or vegetable) stock
vegetable oil to sautee the onion
1 tablespoon heavy cream (optional)
salt to taste
Directions:
1. Drizzle oil in pan, turn heat on medium.
2. Slice onions and add to the pan.
3. Peel garlic, slice, and add to pan. *Note: if you smash the garlic clove it will peel easily, I use the flat side of my knife.
4. Roast peppers over fire (we use the bbq, but you can do it on the stove)
5. Peel, seed, and slice the peppers into strips. Rancho Gordo has nice step by step instructions here
6. Add sliced peppers to onion and garlic, add stock and let cook down. We use our immersion blender to make this into a paste, but you can eat them as they are meant to be eaten--in strips.
7. Add salt and cream if you want and serve with fresh corn tortillas.


If you have never made fresh tortillas, I highly encourage you to start. The flavor is beyond anything you'll find out of a package at the store. They are simple, you just need a tortilla press, the masa (tortilla flour), water, and a hot pan.


Tortilla flour is available at most supermarkets, just be sure the one you buy contains the mineral lime. Mix according to the package. I use wax paper on my cast iron tortilla press, once the dough is flat, scoop it up and put it in the hot pan, cook each side for approximately 30-60 seconds. Keep the tortillas in a cloth so that they steam each other and get their flexible consistency.
Subscribe to:
Posts (Atom)